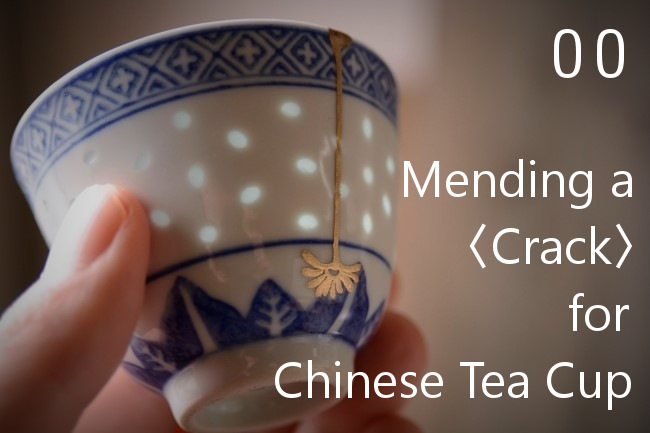
Note: Here I will explain how to mend the Chinese tea cup with a crack running from its rim with《Kanshitsu Kintsugi》method using Urushi and epoxy putty. Real Urushi will be used for finishing, please be aware that you might get a rash.
I will show the procedure from 〈filing the foundation〉to 〈coating with Urushi and finishing with Makie〉non stop.
So, here we go.
- What is 《Kanshitsu Kintsugi》?
- About the Tea Cup
- 【How to”Kanshitsu Kintsugi” 01】 base surface preparation
- 【How to”Kanshitsu Kintsugi” 02】 Applying epoxy paste
- 【How to”Kanshitsu Kintsugi” 03】
- 【How to”Kanshitsu Kintsugi” 04】 Undercoating with Ursushi.
- 【How to”Kanshitsu Kintsugi” 05】 Makie
- What it looks like when it is done.
What is 《Kanshitsu Kintsugi》?
First of all, let me explain what 《Kintsugi》is. 《Kintsugi 》is a Japanese Traditional Technique of mending a broken vessel with Urushi, Japanese Sumac lacqure. Originally we put together the broken pieces with Urushi, fill in the holes or the cracks with Urushi, then coat it over with Urushi, and then cover with gold or silver powder for finish. (When sprinkling the gold (silver ) powder, we use the term “Kinko (Ginko) wo maku.”) .
On the other hand, this modern technique, 《Kanshitu Kintsugi》, we will use more modern material, such as resin, glue and/or putty along with Ursuhi. In that way it will save both time and working process.
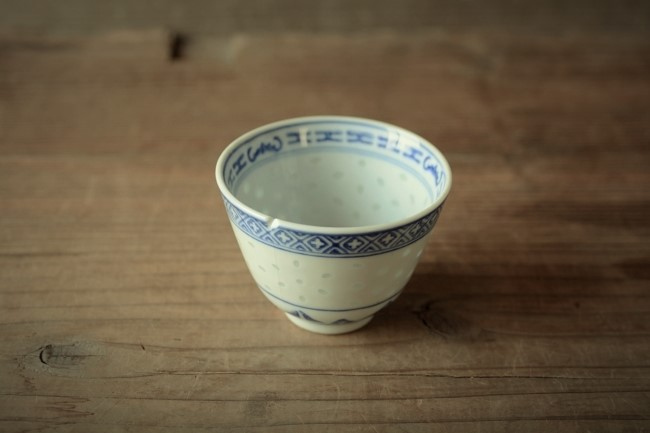
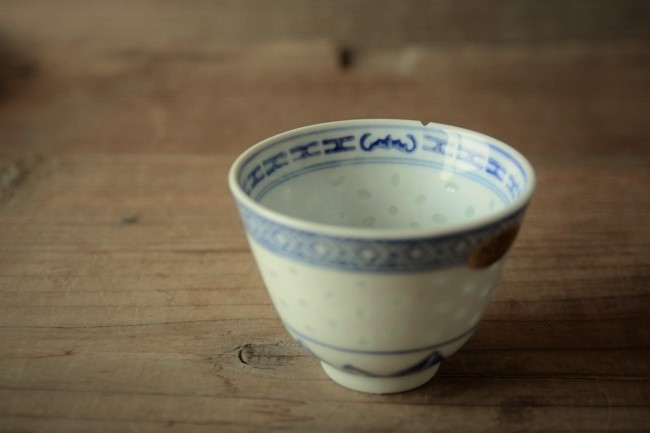
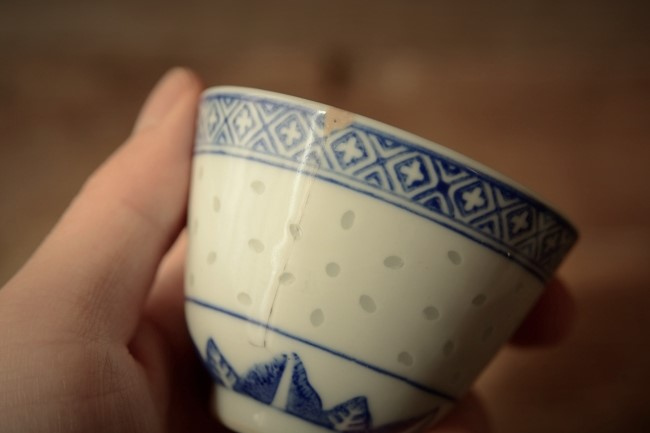
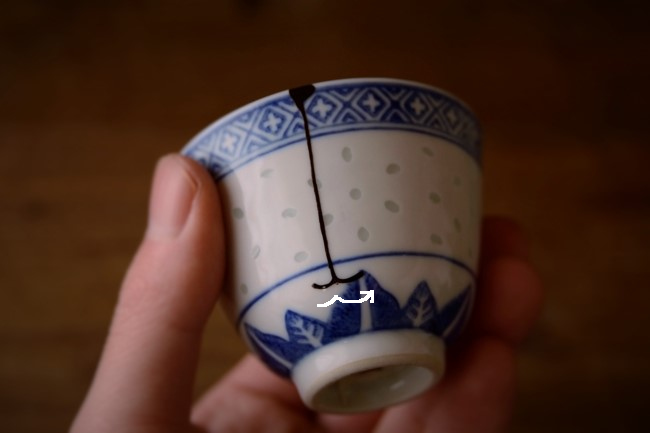
About the Tea Cup
- Tea Cup: Tea cup made in China. Today’s mass-produced product.
- Characteristics of the tea cup: Porcelain with paintings and rather shiny glaze.
- Size: Dia. 75mm / H 55mm
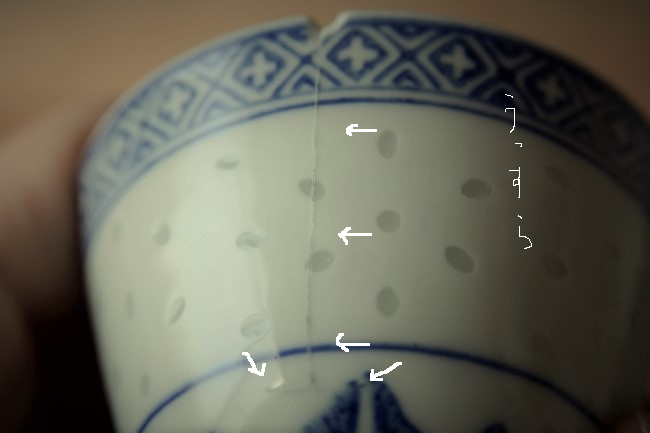
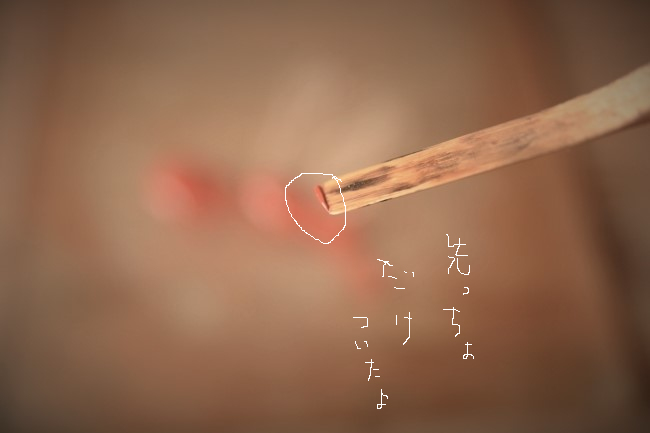
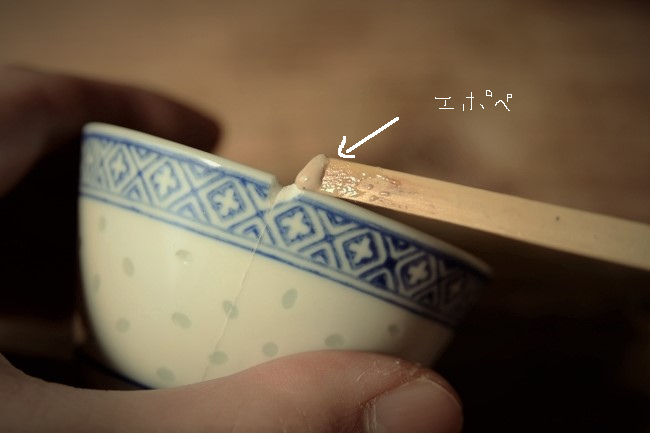
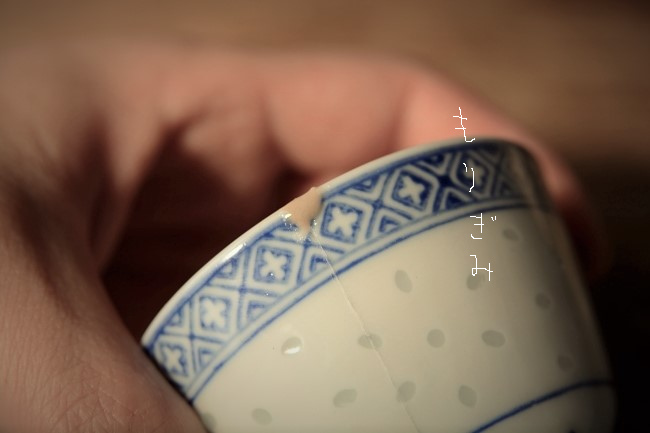
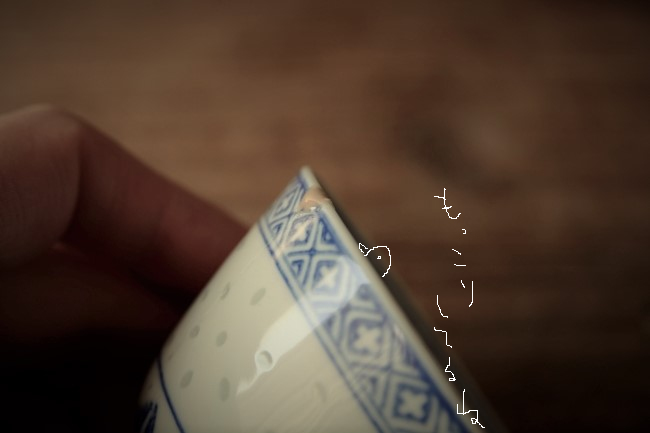
- Condition: Crack from the rim, total length 52mm. (vertical 42mm/horizontal 10mm) , chipped rim.
There is also a chipped rim as well as a crack.

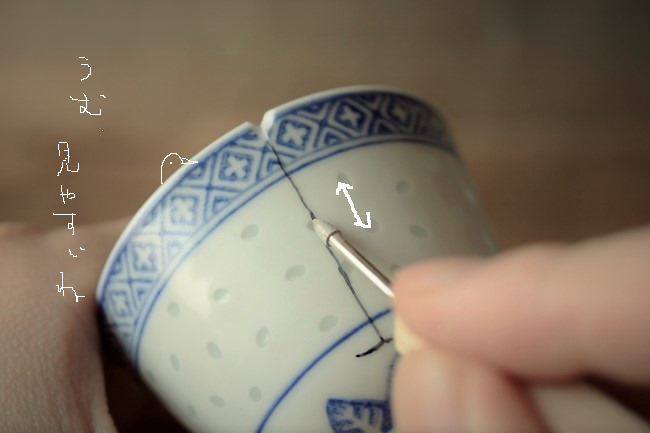
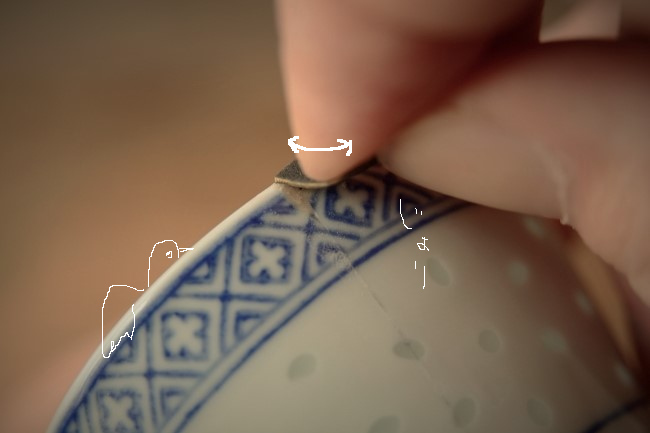
You can see the crack running if you squint.
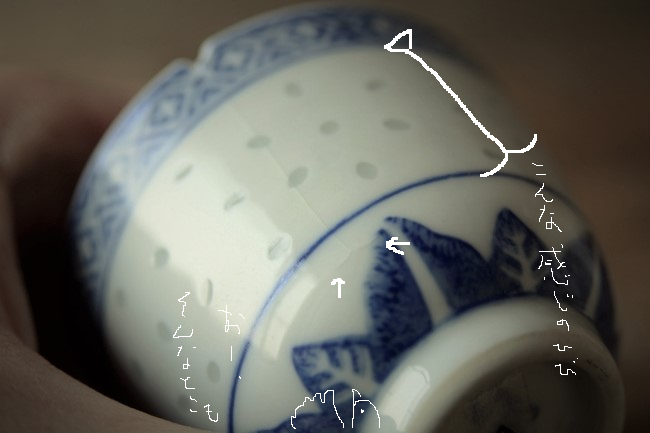
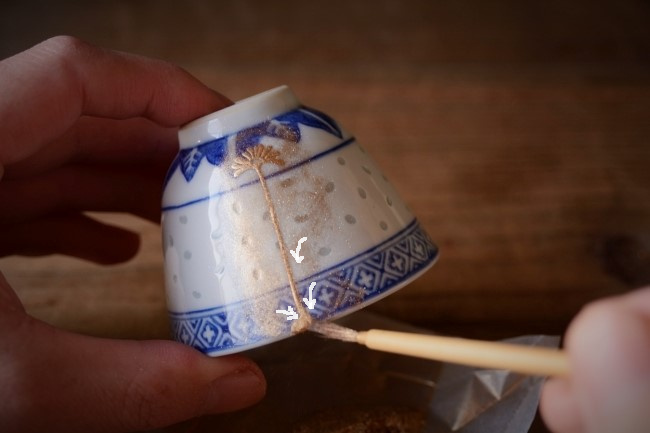
The crack looks like a duke’s mustache.
You really have to be careful not to overlook these small cracks.
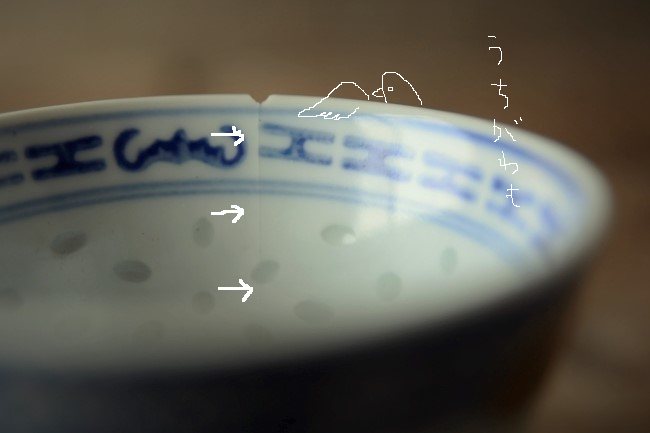
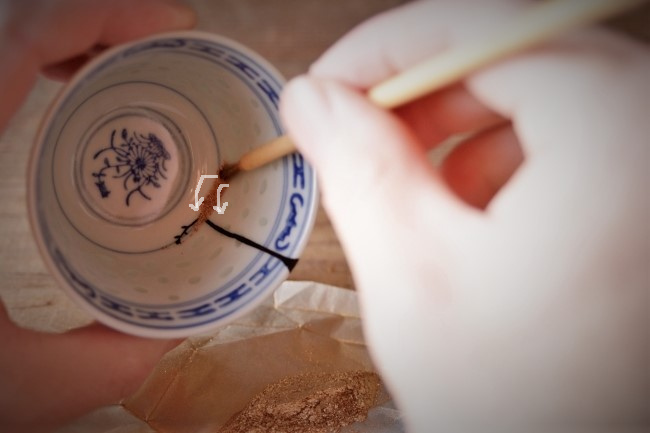
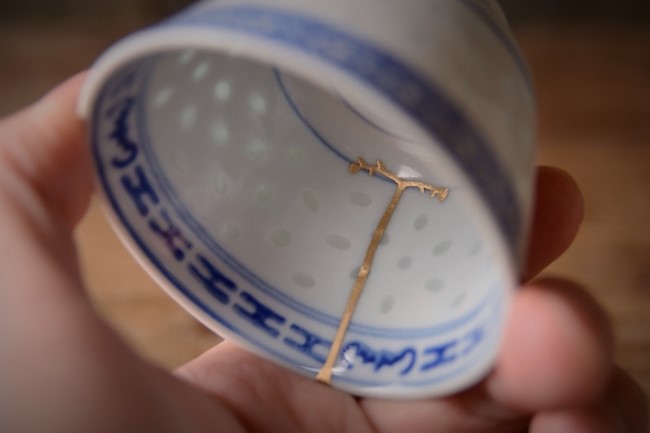
There is a crack inside of the cup.
Inside crack was too, looked like a mustache. It was a bit tricky to find this crack.
When you see a chipped area, basically there will be a crack running around it.
【How to”Kanshitsu Kintsugi” 01】 base surface preparation
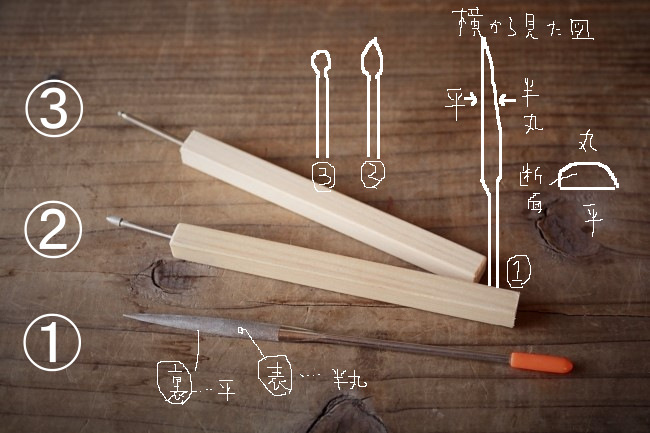
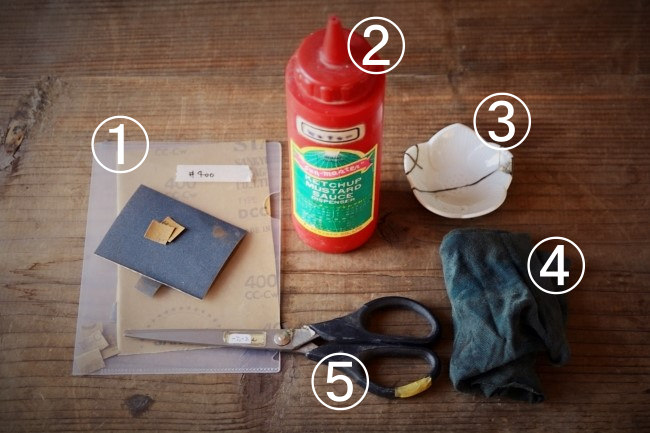
Tools you need in 《Kanshitsu Kintsugi》for surface preparation:
②③Leouter diamond bit. (You can find them at DIY sotres,)
① Diamond file (You can buy it at DIY stores. Price range from ¥600 and up.)
②③Leouter diamond bit. (You can buy them at DIY stores. Price range from ¥200 and up.)
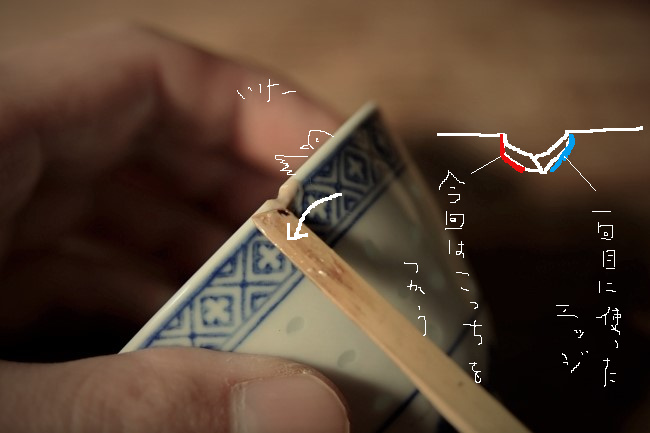
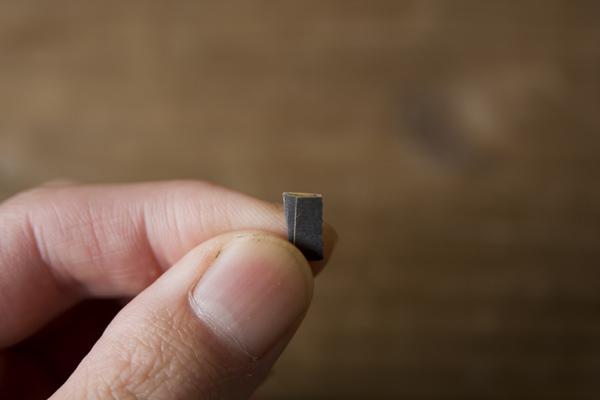
▶︎ How to customize diamond bit.

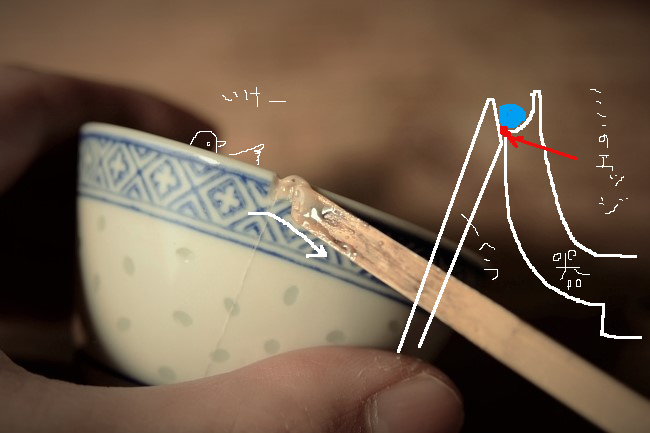
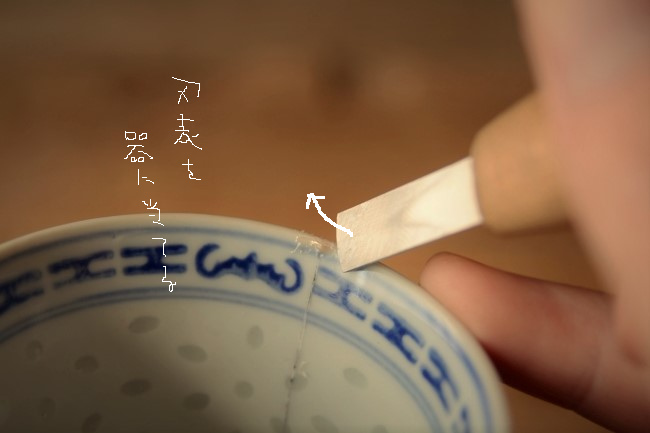
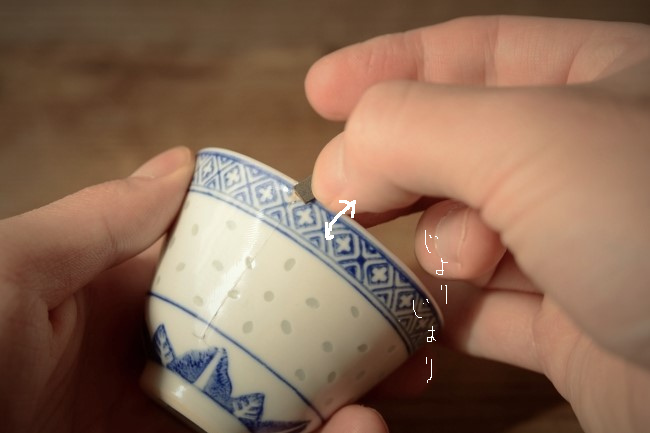
File along this slightly cracked line with diamond file.
File and make a rough surface so that the Urushi will hold onto the surface well.
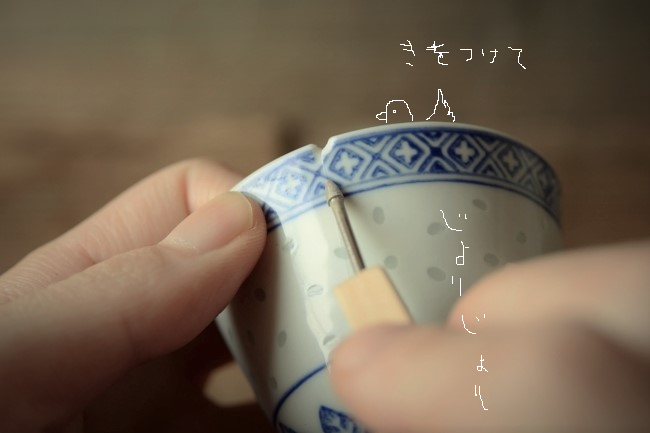
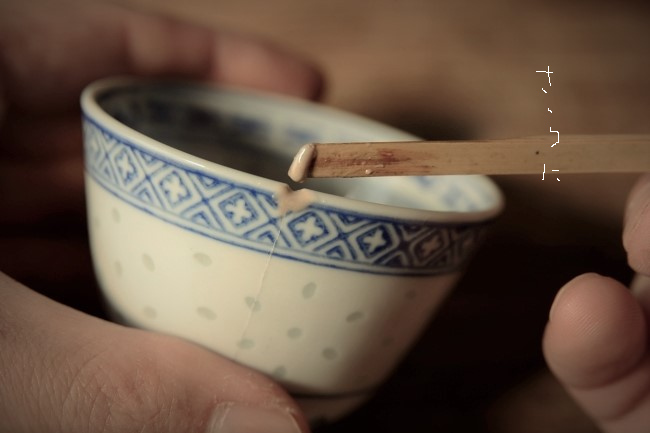
At the beginning, slowly and lightly trace over the line 2 to 3 times, and then gradually put a little bit of pressure and start filing.
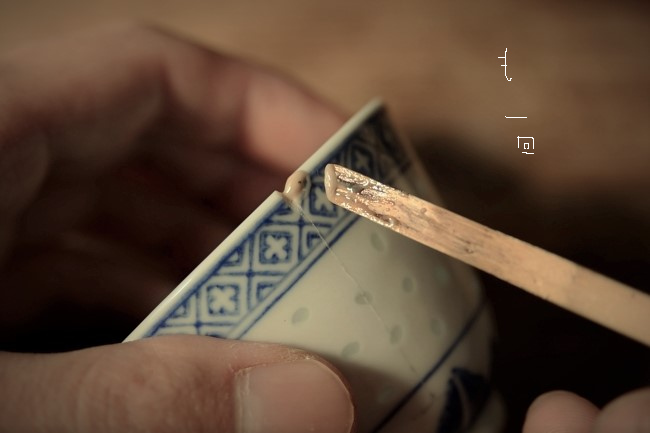
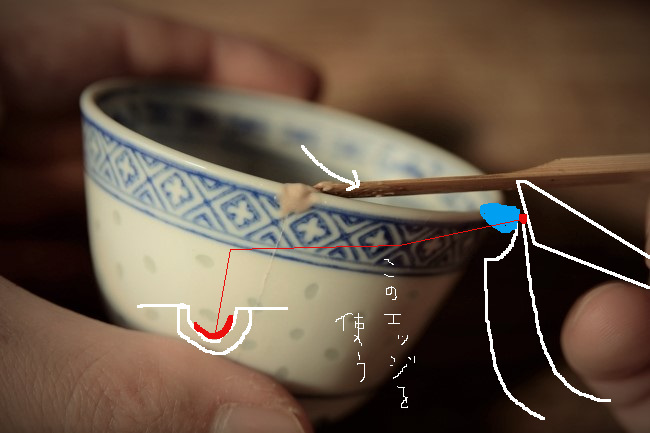
When it is hard to find the crack, trace and draw a line over the crack using either pencil or permanent marker pen. Then file over the marked line.

Do as the same with inside cracked line.
If you can see the slightly scratched surface, the work for base surface preparation is done!
Next, let’s move on to applying epoxy paste to the area where the parts are missing.
【How to”Kanshitsu Kintsugi” 02】 Applying epoxy paste
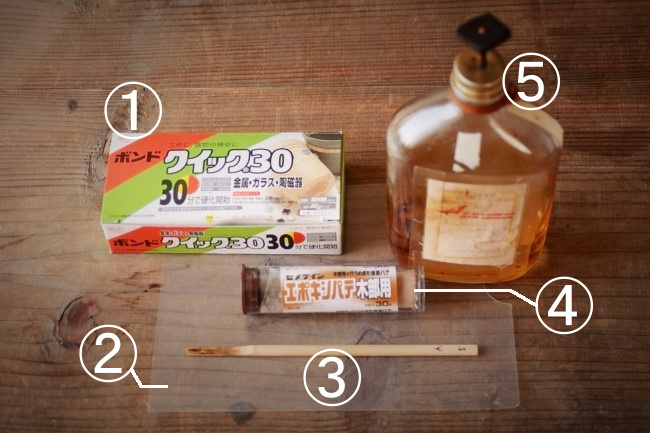
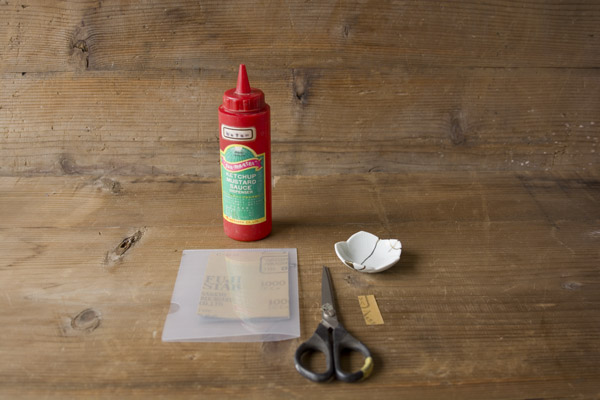
What you need:
- Tools: ③ spatula (Tsuke Bera.) (▶︎How to make your own Tsuke Bera.) ②Work board(Use clear file.)
- Materials: ① Epoxy glue ④Epoxy putty ⑤ Turpentain oil
Now, let’s make epoxy paste. ▶︎How to make epoxy paste.
(If the missing part is quite large in surface, please use epoxy putty. ▶︎How to use epoxy putty.
-
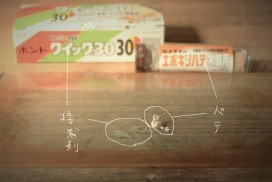
- ① 接着剤とパテをそれぞれ別個によく練り合わせる

-
- パテに少しずつ接着剤を混ぜていく

Method
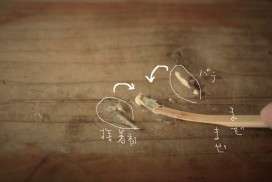
- Squeeze out the same amount of epoxy glue A and B onto the work board (or on a sheet of clear file.)and mix well using your hand. make sure you ware a rubber gloves.
- Mix the paste small amount at a time to epoxy putty. Stop adding the paste when it’s soft enough to apply to the cracked part.
-
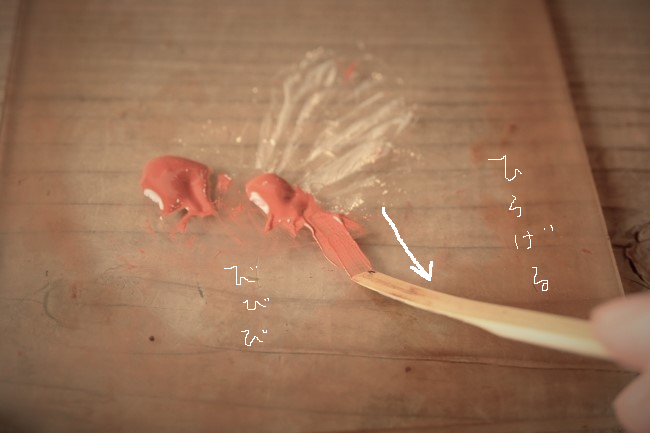
- ①薄く広げる
-
- ②ヘラを寝かせつつ、横から滑り込ませる

-
- ③先っちょにエポキシを捕獲
How to use the spatula. This seems a bit geeky but, when you master how to use them, you’ll be able to get the beautiful finish line and also become addicted to this repetitive movement.
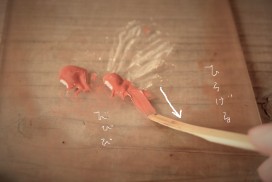
- On the work board, use spatula and thinly spread the epoxy paste.
- Like spreading peanut butter to your toast, lay the spatula on the surface and slide as the image shows.
- Now (if you followed the directions correctly), you have the right amount of epoxy paste on the tip of your spatula.
Note: Maybe epoxy putty might have been the smart choice for crack this size.
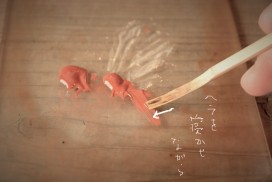
Put a small amount of epoxy paste on tip of the spatula.
Now working for the right hand side, try to put the paste to fill the cracked part.
Using the edge of the cracked area, place the paste to the narrow space.
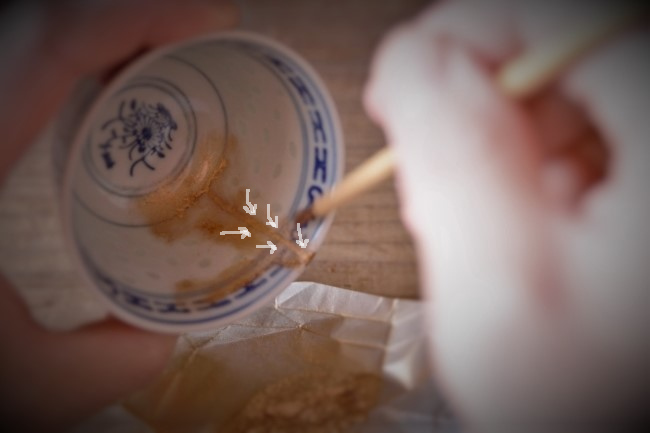
Next, working from the left hand side, place the paste to the cracked area.
Place the paste by sliding the spatula from the left side of the cracked area.
Lastly, use the inside cracked edge and put the paste in the middle of the cracked area.
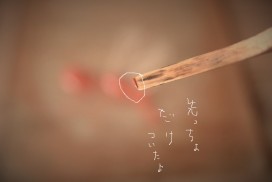
Imagine scraping off the paste from the spatula using the edge.
Looks a little too much on the area, but let’s carry on anyway.
I have not yet figured out the best way to handle the paste. I am trying in many different ways at the moment.
For now, putting what seems like little too much is my best method.
If I come up with much better or easier way, I will let you know.
When the paste hardens, it’s time to scrape off the the excess bits with a knife.
I know it’s best to put on the just the right amount of paste, but it makes it even difficult when you find theres not enough.
SO, that is why I put a little extra.
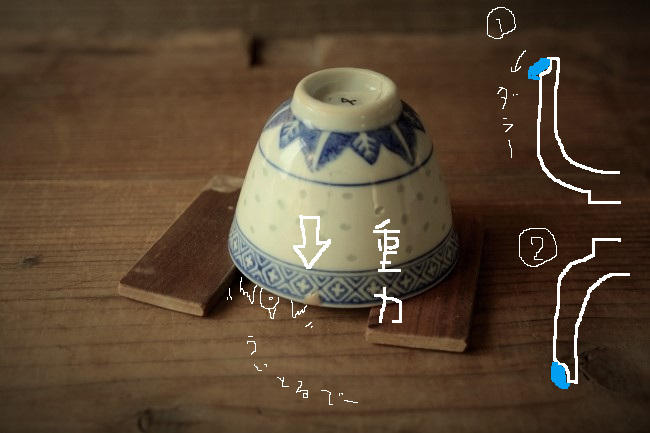
While the paste is hardening, due to its liquidity, it will drip. (This is different from mending with Sabi Urushi.)
Therefore, we must think about the best position to rest.
This time, I will rest the tea cup up side down.
I am sure there are some method which uses this liquid characteristics. I will keep doing research on that.
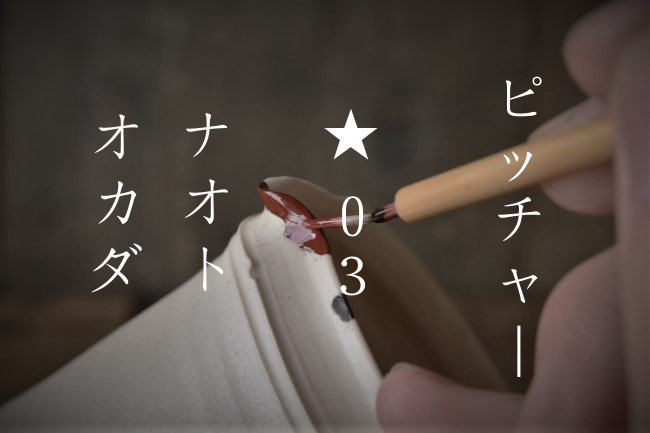
【How to”Kanshitsu Kintsugi” 03】
Recommended tool(s) to grate epoxy paste.
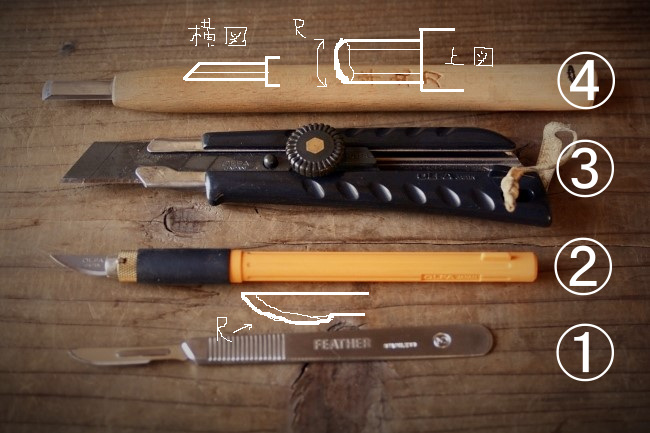
▸ 金継ぎで使うおすすめの刃物のご説明 Explanation for recommended knives in Kintsugi.
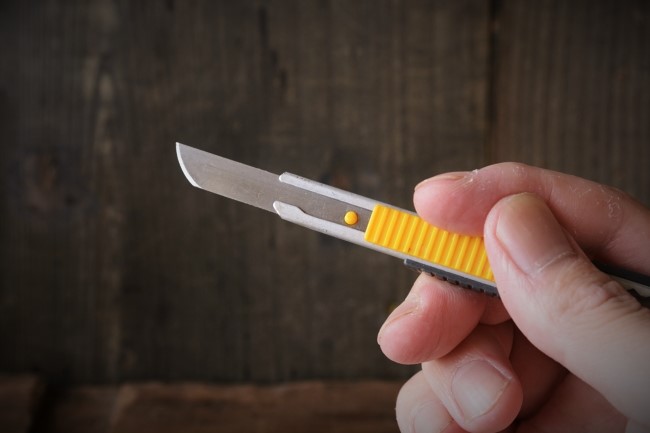
- Tools: ① Surgical knife ② Artist knife (See the Photo for recommended blade type.) ③ Cutter knife (Large one) ④ Chisel (See the photo for recommended blade type.)
おススメは平丸の彫刻刀です。 ▸ 金継ぎで使う彫刻刀のカスタマイズ方法
My favorite has to be the chisel. ▶ How to customize the chisel for Kintsugi.
I personally and highly recommend this ④chisel knife. It makes it so much easier working with this, and when the tools are amazing, it makes the whole process so much fun.
▶︎ How to customize chisel knife for 《Kintsugi》.(not liked yet)
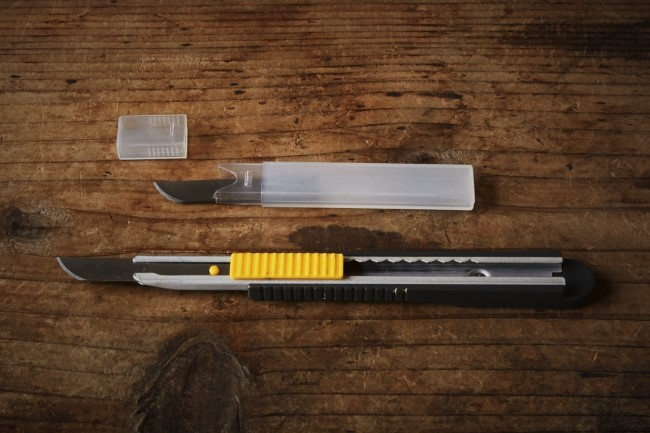
For alternative plan, please look for ⑤ (Shoujigami-yo maruha cutter; an art cutter, especially made for cutting Japanese traditional Shouji paper.) You may find them at DIY store in Shouji repapering area. (They weren’t in cutter and knives area.)(This information is only useful if you are living in Japan.)
Now, let’s start grating.
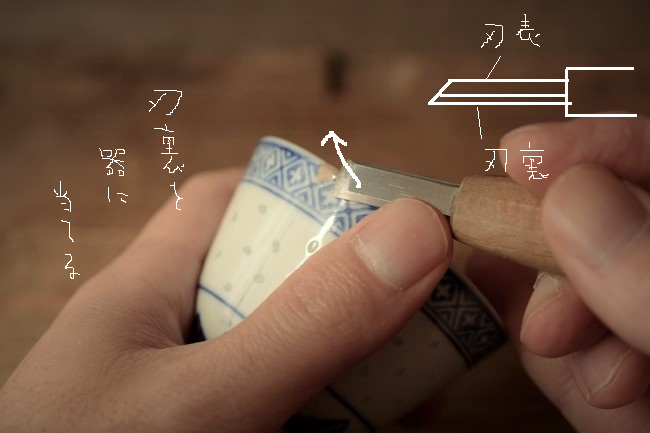
Basically, for the outer side of the cup when grating, i will use chisel. Put the back side of the blade onto the surface of the cup and grate.
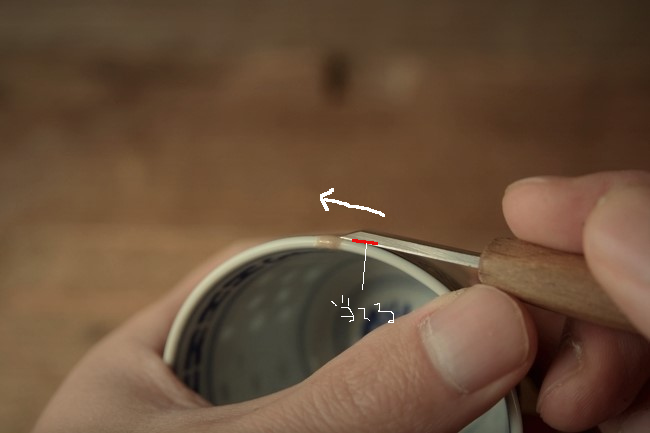
This is how it looks like from the top.

When grating the lim, continue to use the back of the chisel as a guide so to have the leveled surface.
While grating, check the surface from various angles and grate the part
where isn’t leveled.
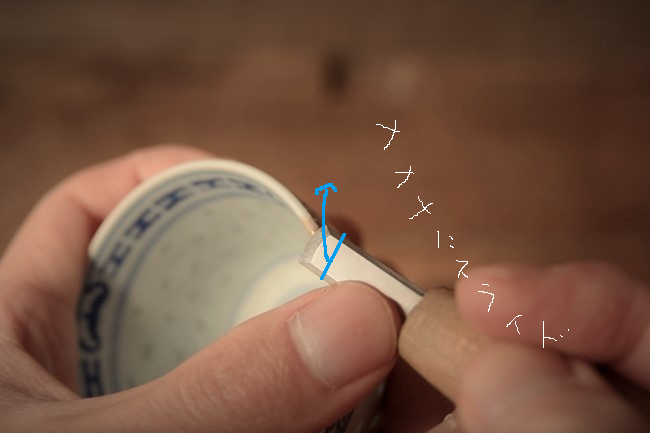
When grating, apply the chisel little bit diagonally and slide to grate.
(as the photo shows above)
In Budo or in Crafts, it is considered very important to divide the vector to various directions.
When grating the inside of the cup, apply the front side of the chisel.
Make sure to pay a great attention and grate very carefully. If you grate it too deep, then must go back to step 2 and put the epoxy paste again, so you want to avoid that.
After finishing grating, let’s move on to sanding with water proof sanding paper.
Tools to use for sanding epoxy paste.
- Tools: ③ Small dish ( for water) ④ Waste cloth ⑤ Scissors (Only for sandpaper usage .)
- Materials: ① Water proof sandpaper (I used #400) ② Water
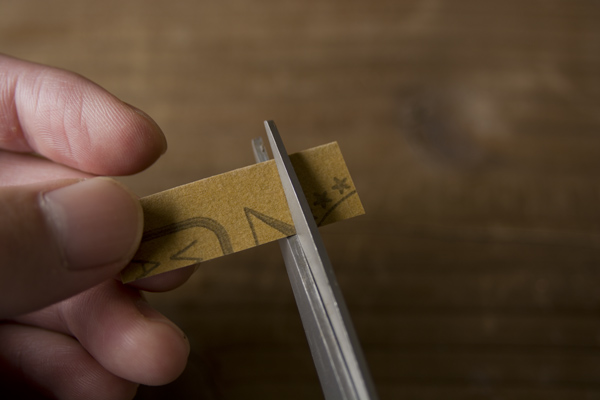
- Tools to use when filing with sandpaper.
- First cut the sandpaper 1cm ×1cm
- fold them in three.
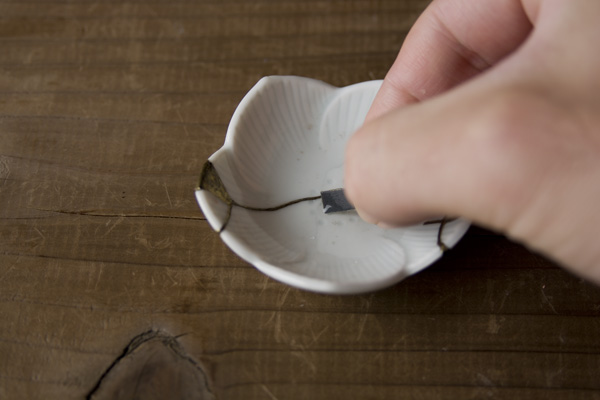
- Dip it in the water in the dish.
Using sandpaper, try to smooth the grated surface.
Pinch the sandpaper and sand the epoxy paste part. Try not to sand the original ceramic surface, although it is literally impossible.
Done.
【How to”Kanshitsu Kintsugi” 04】 Undercoating with Ursushi.
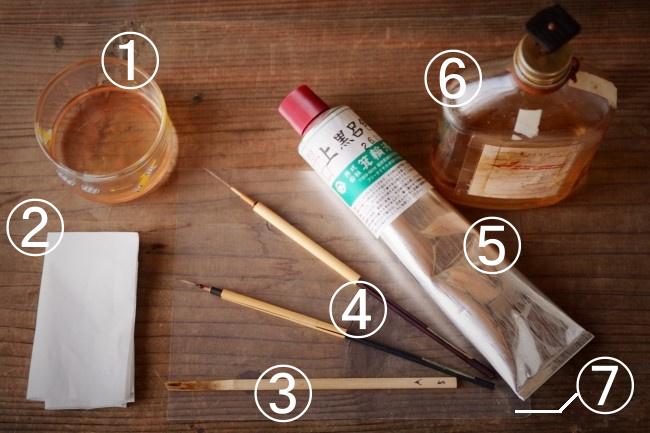
Tools and material you need for undercoating with Urushi.
- Tools: ② Tissue paper ③ Spatula (Tsuke-Bera) ▶︎How to make (Tsuke-Bera)④ Small paint brush ⑦ Work surface/board(Clear files will do the job.)
- Materials: ① Vegetable cooking oil ⑤ Refined Urushi ( I used Ro-iro (Black) Urushi.) ⑥Turpentine oil
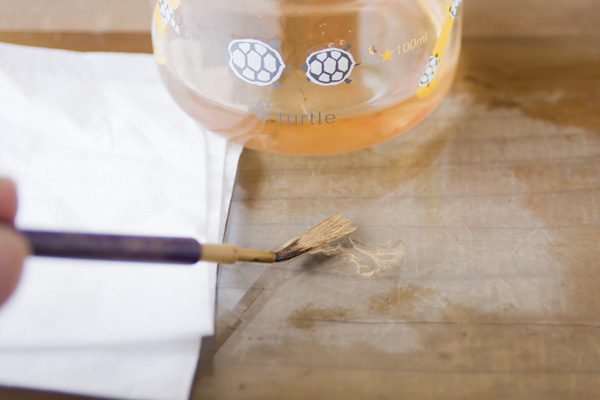
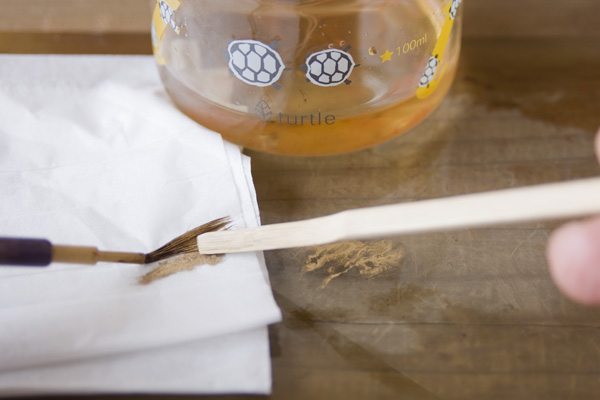
First of all, let’s wash the oil from the paint brush using turpentine oil.
▸ 詳しい筆の洗い方 ▶︎ How to wash the brush properly.
Brush will be holding some oil, make sure you take off all the oil. (The reason why the brush has oil is that we clean the brush with oil after using it.)
- Apply few drops of turpentine oil on work surface.
- Swirl the paint brush over the oil and let the brush soak the oil.
- Lay the brush on top of the tissue paper and with the gently squeeze out the oil.
-
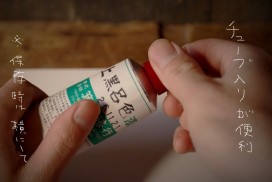
- ①キャップを開く(この写真で使っているのは”呂色(黒色漆)”です)

-

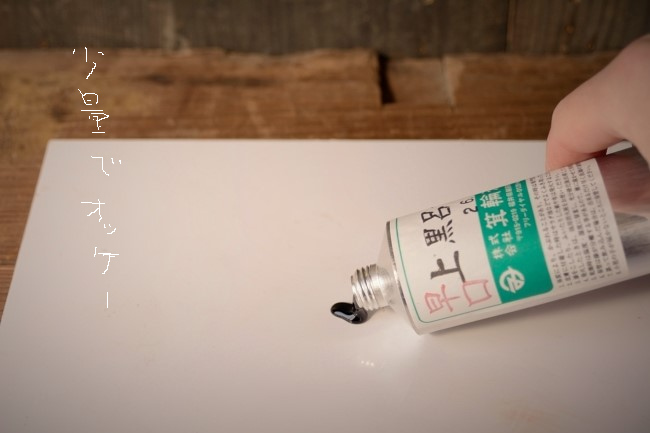
- ②漆を出す。ほんのちょっとでオッケー。
-

- ③漆を筆に含ませる
-
- ④漆の含み具合を調整する

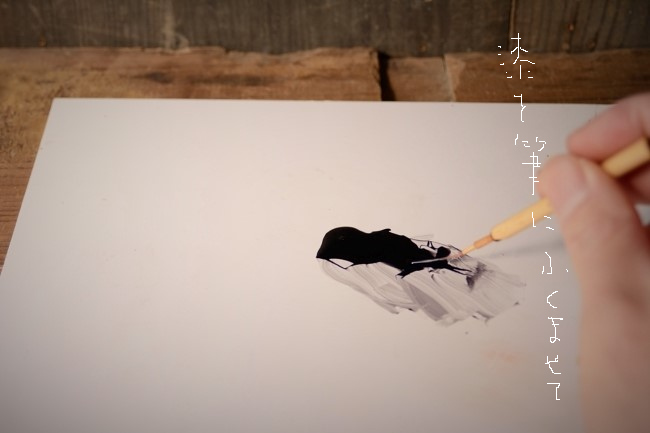
- Open the Urushi tube. ( The colour I am using in this photo is called “Ro-Iro.” It means beautifully glossy black.)
- Take out small amount of Urushi on work surface.
- Temper Urushi with the brush.
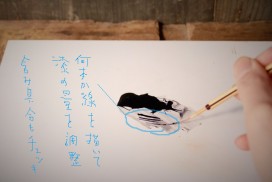
- Try drawing few lines on the work surface and adjust the amount of Urushi you want the brush to hold.
note: You may find some tiny foreign object mixed in Urushi. If you do find them, filter it with filtering paper before use.
▸ 基本的な漆の扱い方・濾し方 ▶︎ The basic way to use and filter Urushi.
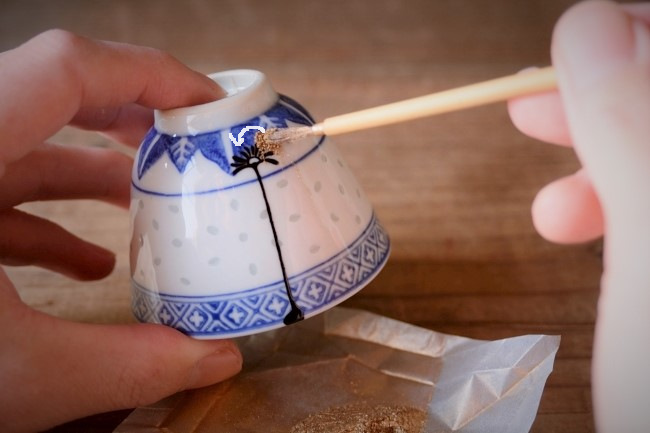
When the brush and Urushi preparation is done, we are ready to apply Urushi.
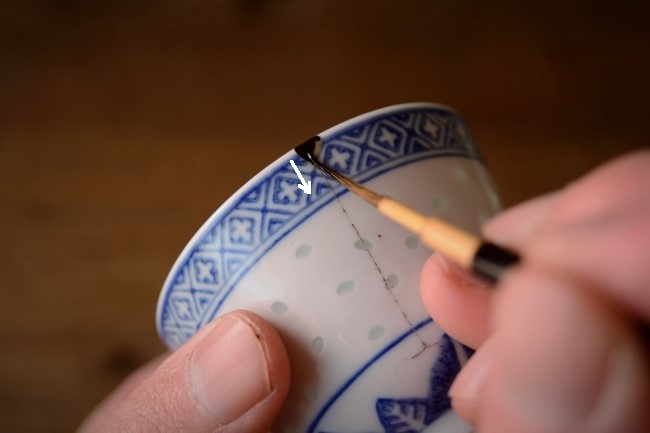
Apply Urushi evenly and thinly as possible.
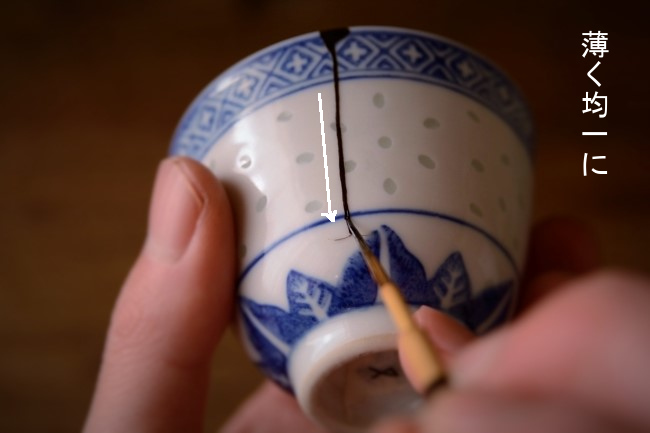
If you find the Urushi painted too thick on the surface, try painting a few times not only the thick part but surrounding area to level the painted line.
Don’t forget to paint the mustache shaped crack part as well.
When finished, store in a humid place with humidity 65% and up.
Wait for half an hour to an hour, when the Urushi startes to dry it’s time to
move to the next stage.
If you are not too sure when, you may start applying the gold powder at earlier stage.
If the Urushi is dried, the gold powder will not stick, to it’s better to it earlier than later.
note: The drying time may vary depending on various conditions.
Usually, we test before using Urushi to know it’s characteristics. (Such as drying time.)
塗り終わったら油で筆を洗います。 ▸ 詳しい筆の洗い方
- Soak oil to the brush
- Squeeze out using spatula on tissue paper.
Put a lid on after washing.
If you don’t have a lid, wrap it with cling film.
【How to”Kanshitsu Kintsugi” 05】 Makie
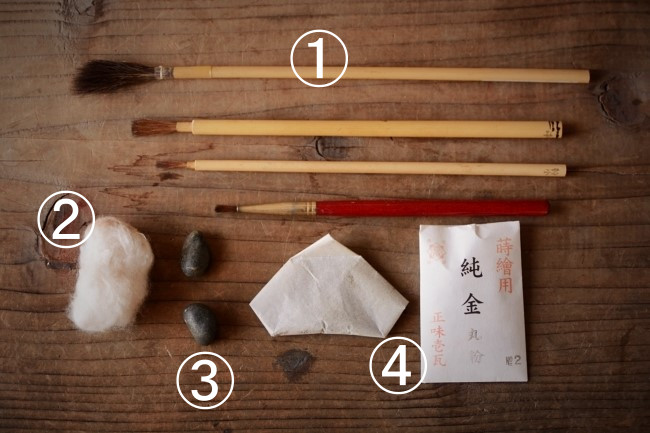
Tools and material for Makie.
- Tools: ①Ashirai Kebou (Brush with soft hair) ③ small paperweight
- Materials: ④ Makie Fun(I used tin powder.)
The ideal timing to sprinkle (maku) the powder (Makiefun) is when Urushi
starts to dry.
How to tell when it’s the right time is to blow over Urushi. If it’t the right timing, the colour of Urushi changes to blueish white. It is called “Aoto” or “Aoiki”. However, there may be different way of saying depending on the regions.
Scoop the Makiefun ( the powder) on tip of the brush and then apply that powder onto where Urushi is painted. Please use the soft fur type of brush.
Apply quite a generous amount of Makiefun ( the powder ), move the brush gently and move the powder over along the Urushi.
When inside is done, apply the powder on the outside as well.
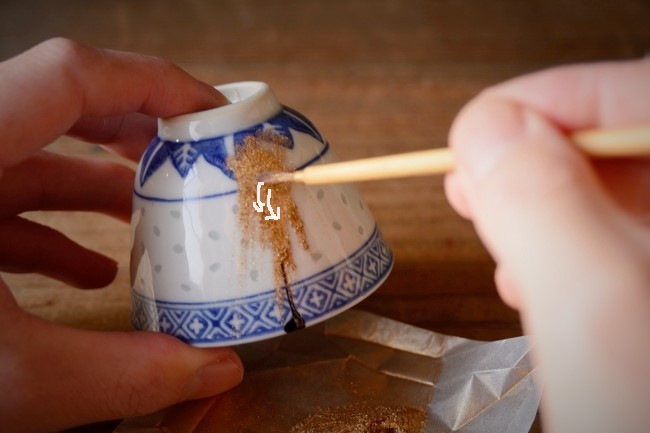
Apply the tin powder onto where Urushi is painted.
If you have enough amount of Makiefun ( the powder ), the powder will not stick
to the tip of the brush.
When doing Makie, work over the wrapping paper for the powder, so that the powder will not be waisted.
Check carefully if there no parts without the powder, especially the rim, this area is very difficult and usually needs a good attention and a good amount of powder.
Store in a place with humidity over 65% for 3 to 4 days.
What it looks like when it is done.

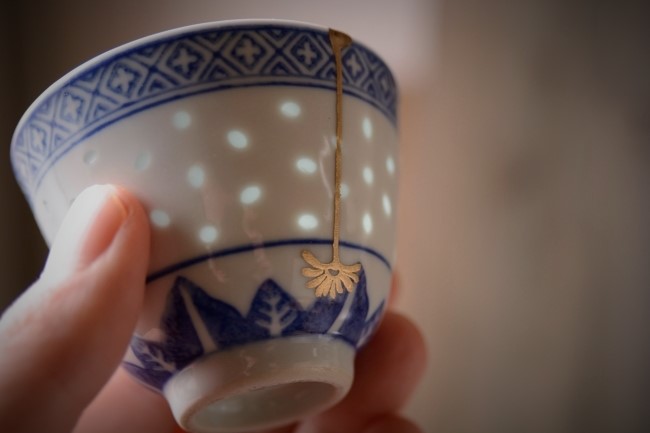
So, this time I did Makie on the inside as well.
I designed intentionally, inspired by the botanical design drawn at the bottom of the tea cup.
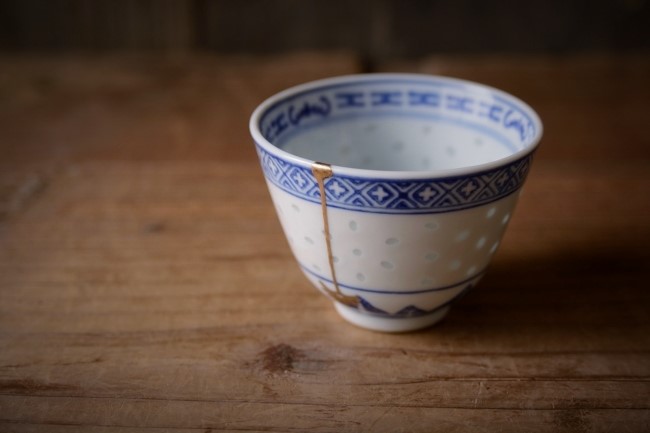
Here, I drew a plant-like design inspired from the original design on the inside.
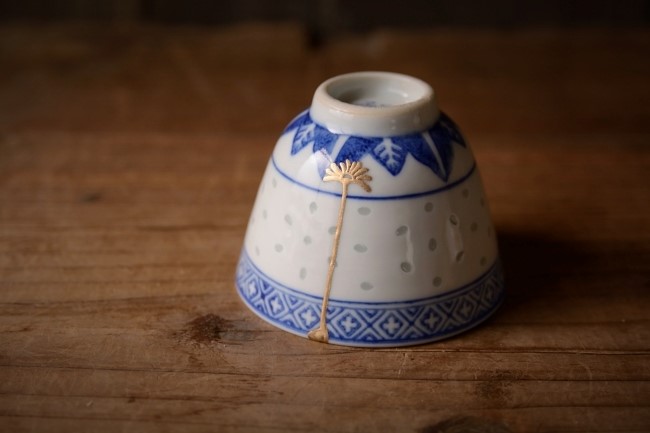
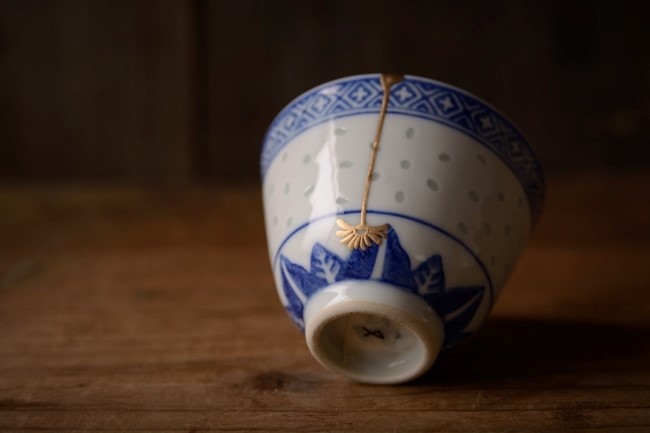
When storing the cup upside down, it looks as if this golden flower is growing right from the ground.
Botanical.
This tea cup has kind of openwork like dots as a design.
Light comes through the dots and it looks like a snow.
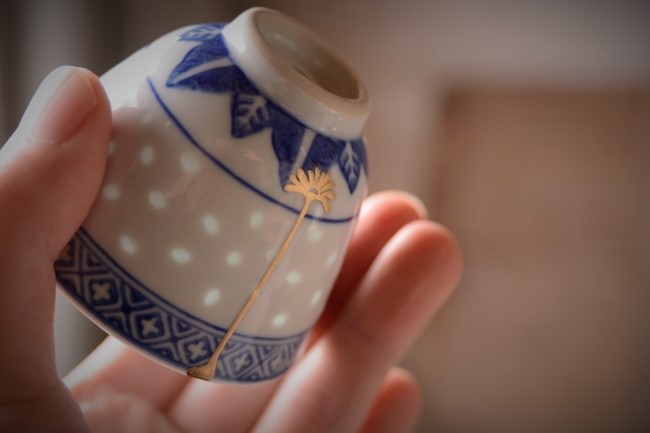
It looks as if this golden flower is standing silently and strongly in the snowy scenery.
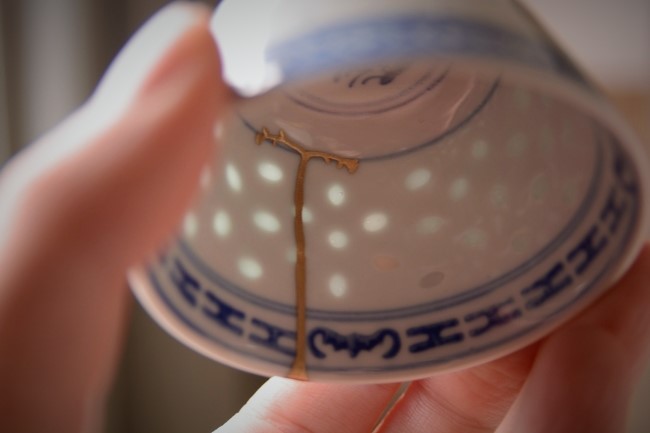
We don’t often see a tea cup through the light. (Don’t we?)
It’s such a wonderful coincidence to come across to find such a lovely view like this.